 |
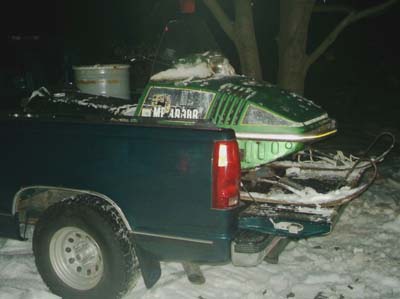
Well the lack of snow winter has pretty much set the tone for the amount of activity in the garage. I love to ride them, but get a distinct excitement out of making them look and run as they were when brand new. With only a couple of rides on the old cheetah's this year I have had a lot of time to work on my Cyclone. I picked it up a little over a year ago, it had been sitting in a guy's back yard for several years and looked really rough, but is was something about the basic shape that I liked and figured all painted up it would be a great looking sled, not to mention a rare vintage Deere here in New England. After a little bargaining I ended up handing him $200 for a large drum of new and used cyclone parts, a rare motor from a JD340/s race sled (complete from carbs to clutch) and the cyclone you see here. |
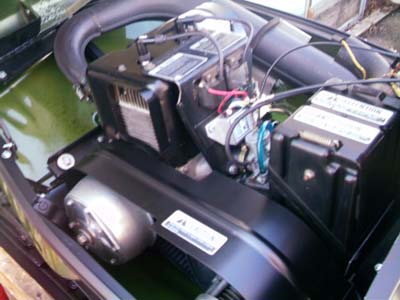
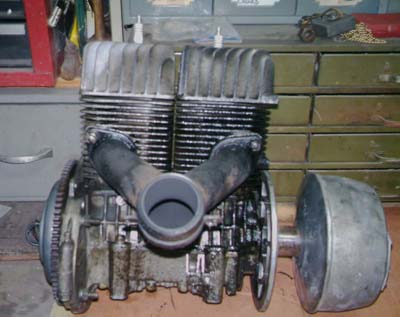
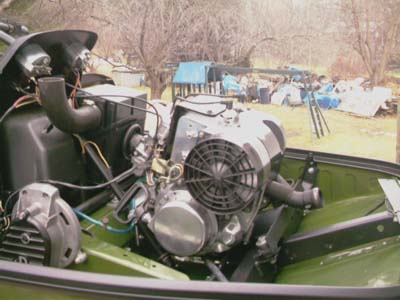
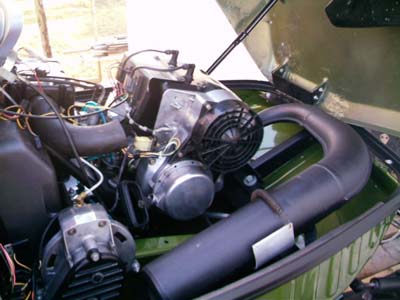
| After getting it home I just had to see if I could just get it running for a couple of quick blasts around the ponderosa before all the snow melted. First things first, I removed the old gas, cleaned the carb, checked the fuel pump, changed the fuel filters and lines, and tested for spark with a new set of plugs. Well before I knew it I was pulling the cord to see if she would fire, and after about 10 pulls it was running, but not great, it wouldn't idle and sounded like it was running on 1 cylinder, so I shut it down and took a closer look. It didn't take long to discover the PTO crank seal pretty wet and leaking. Now it was time to by the correct clutch puller for the 102c comet clutch and a complete gasket kit for the Kioritz 440\2 motor. Both crank seals were replaced as well as the intake and the exhaust gaskets. I didn't do the cylinder head and base gaskets, because a compression test showed me 145 lbs per cylinder and I was too anxious to get it running, the snow was disappearing quickly. |  |
 |
I
put the motor back in and started pulling the cord again, she fired right
up idled well and gave me some nice hot laps around the ponderosa, not
to mention, couple of acceleration bursts complete with dancing ski's,
when all the sudden nothing. After a brief investigation, the cdi had
given up and needed to be replaced. Oh well…Anyway just this quick
ride around the yard and the seed was planted… I had to restore it. So the snow was almost gone and it was time to put it up on the table and start the restoration. Disassembly and labeling was the first order of business. During the labeling process I noted the order in which everything came apart so that it could be used as a reference when the sled was put back together. Once I had it completely disassembled I began isolating assemblies and working on them one at a time, welding, sandblasting, priming, and painting where needed. |
|
|
 |
 |
 |
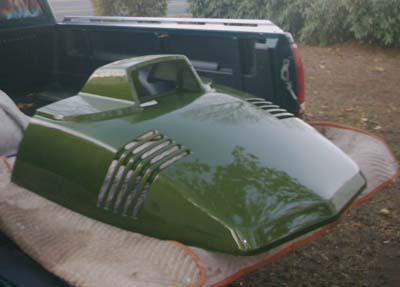 |
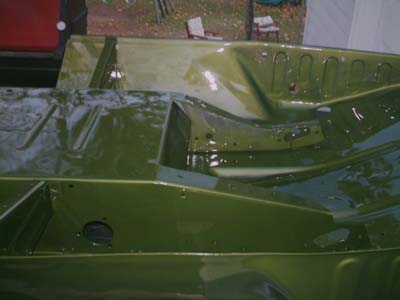
Now that the tunnel was ready to paint it was time to do the hood. The first thing about fiberglass repair is that it's a dirty job, it's important to wear long sleeve shirts, a hat, and a respirator. The object is not to get the sanding dust on your skin or in you lungs. This stuff will make you itch!! Next I purchased a fiberglass repair kit and got to work. All the repairs that I did were using the resin and matting only, from my past experience even thin layers of bondo have a tendency to crack over a short period of time. I believe it is a combination of thin fiberglass typical snowmobile vibrations. Once all the fiberglass repairs were complete it was primed with alternating light and dark colors of high build primer. This enabled me to make the surface very flat during the block sanding process, because, the high and low spots were readily visible. One last coat of primer the same color as the tunnel and now the hood was ready for paint as well |
|
When I dismantled the sled the paint was peeling so badly that many of
the decals came off in tact with the paint stuck to the back giving me
a perfect example un-weathered paint to match to. I had heard on Joe and
Matt's John Deere site it was an old Ford color called Ivy Bronze. Well
after a couple of hours in my friends body shop, going through old paint
books, I found a chip that matched the paint on the back of my decals,
sure enough it was ivy bronze, a 1970's ford Mustang color. A color cross-reference
came up with, Centari 4335a. One more light sanding with a scotchbrite
pad on both the hood and the tunnel and the new paint was sprayed at the
body shop, complete with a top coat of polyurethane clear. After I got it home the reassembly started, it was slower process that I expected, because you have to be patient so you do not scratch or damage any of you freshly painted parts. The further I got into the reassembly the harder it got not to scratch something. At this point I was certainly glad I listed the order in which things were disassembled. It eliminated having to take something back apart so another assembly could be properly installed first. This was something I learned the hard way on the cheetah restorations. To polish my aluminum parts such as the clutches motor and chain case. I started out with Gunk engine cleaner to remove the heavy grime. After this a scotchbrite pad, a can of w-d40, brass brushes and lots of scrubbing. This was followed by, metal polish and a buffer wheel on the cordless drill. It will look great for a while, but remember unless you clear coat it will eventually re oxidize. |
 |
 |
Restoring
the seat was pretty straight forward after locating new seat cover at
John's upholstery I re- cut a new piece of plywood for the seat base.
Fixed any damaged foam with contact spray adhesive, and some new pieces
of foam. The trick was to cut out the section you needed to repair with
a hack saw blade and then cut a new piece of foam to fit. I Sprayed glue
both the new piece of foam and the area to be repaired, waited a few minutes
and stuck them together. The foam could be shaped further to match the
original contour by using a DA sander set to spin, with a 40-grit sanding
disk. It's best to practice this before diving into you seat foam, it
requires a very light touch. For stretching the new cover on, I first aligned the seams and then stretch it over the plywood and stapled from the middle out alternating from the right side to the left side. Once both sides were done I then did each end followed by the corners. |
|
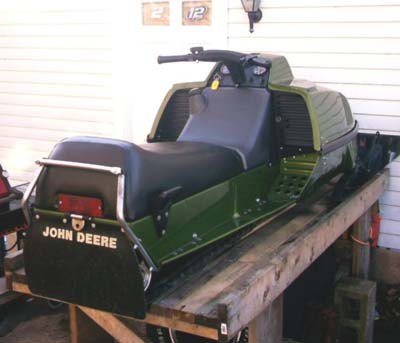
I was fortunate enough to find both, a genuine JD service manual and Illustrated parts manual for my Cyclone on Ebay. These made me much more confident during the re-assembly process and also became a very important tool in setting assemblies to the proper specs, most of which are pretty critical, clutch and track alignment, carburetor adjustments, jetting info, various power train tensions and clearances, and the proper way to align the steering just to name a few. Well at this point it's all back together and waiting for snow. There re still a couple of small things to do, apply the decals get a windshield and finish some minor wiring. Even if we don't get any more snow this year it all set for next year and I got to get working on my next project, a 69 Panther. I've tried to share some of the more important things, but if you have any specific questions please do not hesitate to contact me at kthunt@Comcast.net and always think snow. |
|